How to transform a barbershop simulation into a D&D solver
Step 1: Fiddle with the HTML and CSS
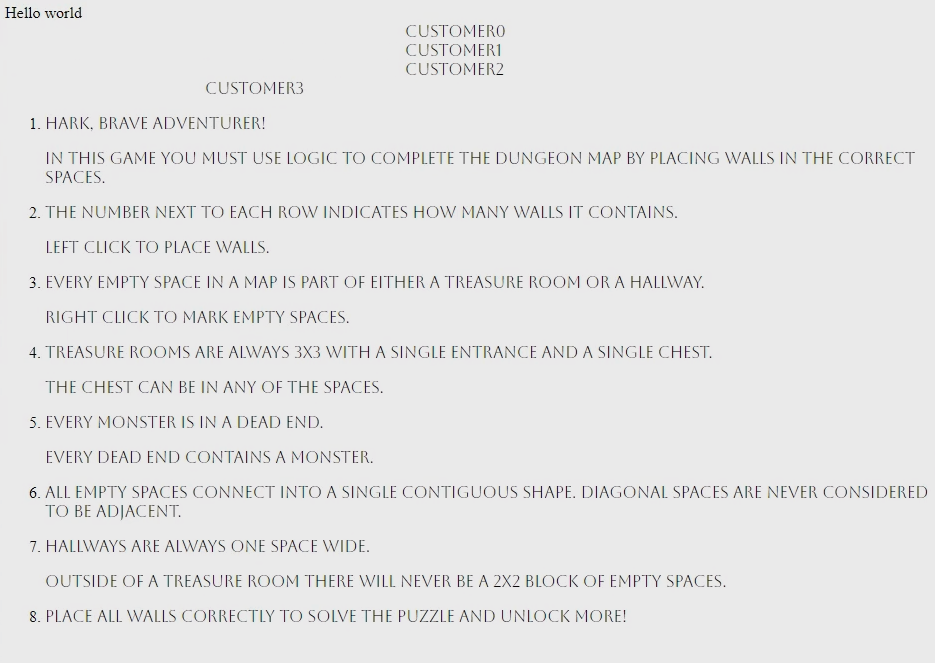
I wrote a simple barbershop simulation, based on a talk by Anjana Vakil. The customers are generated on the left. They go and get their hair cut. Maybe they wait. That one had to wait. And then when they're done getting the haircut, then they go over here. It's not very complicated.
What I'm gonna do today is transform it into a Dungeons and Diagrams solver. Dungeons and Diagrams is a puzzle game by Zach Barth, where you get clues, numbers, for each row and each column. There are some rules about how dungeons are layed out, and you deduce where the walls are, by combining the rules with the clues, similar to Sudoku or Nonograms.
So to start, let's just make it look a bit more like Dungeons and Diagrams.
<ol>is the HTML element for "ordered list".<li>is the HTML element for "list item".- Aboreto is a maybe-cute font from Google Fonts. The Google Fonts site has a couple snippets of HTML and CSS to put into the header of the HTML, and the CSS style file.
and then it might look like this:
Also, I recorded myself saying much the same content as the text here, but in the form of a video.
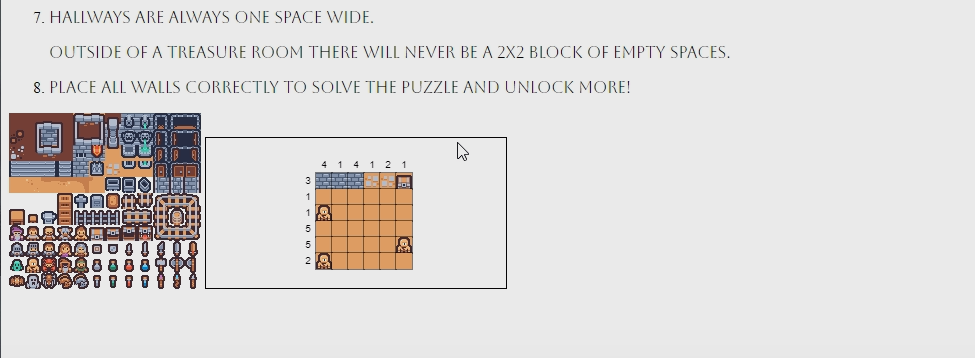
Step 2: Add a painted rectangle of tiles
There's still a barbershop simulation going on, but now there are instructions, and the instructions have a font. The next step is to add something like a painted rectangle of tiles.
So I go over to some code that I wrote previously, a different project, and copy and paste it into this project, and debug. (This technique is called 'bricolage'. Sherry Turkle wrote an essay about it.)
<canvas>is the HTML element for the tilemap code to paint into.<img>is the HTML element for the tileset, that the tilemap code paints from.- I am using Kenney's Tiny Dungeon tileset. (If you're following along, you might enjoy using Kenney's Scribble Dungeon tileset instead - or look around for another tileset, or make your own!)
And now it is painting a rectangle of brown dungeon floor with a scattering of cyclopses on it, instead of a blue ocean with a scattering of buoys on it.

Also, I recorded myself saying much the same content as the text here, but in the form of a video.
Step 3: 'Paint' a 'screenshot' using functions
Next is improving these graphics. I imagine that I am 'painting' a final 'screenshot' of the solver, just using javascript functions. (This reframe switches me into comfortable "Huh, weird art tool, but ok" mode. Your mileage may vary.)
This is the scene that I am painting, in ascii art:
 414121
3###xx$
1......
1m.....
5......
2.....m
1m.....
In the first row, there are three walls and two nonwalls and a treasure, and then there are a whole lot of unknowns and monsters.
When I imagine myself painting this manually, I probably would move left to right, top to bottom.
// row 0
paintWallAt(0, 0)
paintWallAt(0, 1)
paintWallAt(0, 2)
paintNonwallAt(0, 3)
paintNonwallAt(0, 4)
paintTreasureAt(0, 5)

// row 1
paintUnknownAt(1, 0)
paintUnknownAt(1, 1)
paintUnknownAt(1, 2)
paintUnknownAt(1, 3)
paintUnknownAt(1, 4)
paintUnknownAt(1, 5)

// row 2
paintMonsterAt(2, 0)
paintUnknownAt(2, 1)
paintUnknownAt(2, 2)
paintUnknownAt(2, 3)
paintUnknownAt(2, 4)
paintUnknownAt(2, 5)

// row 3
paintUnknownAt(3, 0)
paintUnknownAt(3, 1)
paintUnknownAt(3, 2)
paintUnknownAt(3, 3)
paintUnknownAt(3, 4)
paintUnknownAt(3, 5)

// row 4
paintUnknownAt(4, 0)
paintUnknownAt(4, 1)
paintUnknownAt(4, 2)
paintUnknownAt(4, 3)
paintUnknownAt(4, 4)
paintMonsterAt(4, 5)

// row 5
paintMonsterAt(5, 0)
paintUnknownAt(5, 1)
paintUnknownAt(5, 2)
paintUnknownAt(5, 3)
paintUnknownAt(5, 4)
paintUnknownAt(5, 5)
When I run it, I see an error, something like "paintWallAt isn't a thing?". After implementing paintWallAt:
// a utility function to paint a wall at a spot.
function paintWallAt(row, col) {
  let [x, y, w, h] = fromRowColToRect(row, col, TOP_EDGE, LEFT_EDGE)
  paintTile(row, col, SPRITES.WALL)
  CONTEXT.strokeRect(x, y, w, h)
}
and fixing up some bugs, it looks like this:
- Aiming for a milestone, like a screenshot, allows me to iterate on it.
- I like "playing computer" and trying to do manually once what the computer will eventually do many times.
- I use wishful thinking ("If only there was a
paintWallAt(row, col)function... ") to invent new functions.
Also, I recorded myself saying similar as the text here, but in the form of a video.
Step 4: From customer process to row process
I want to adapt the barbershop's customer process so that after it knows where the three walls are, then it can conclude that the other two must be nonwalls.
The customer waits and watches the barber. When the barber is available, the customer goes and gets their hair cut and then departs.
The row process is waiting and watching all of the cells in its row, and when one of them is discovered to be a wall, it counts down. When it gets to zero, it marks all of the unknown cells in its row as nonwalls.
function* row_process(who, i, walls) {
  console.log(`${who} is awake and active`) // DEBUG

  let waiting_for = {}
  for (let j = 0; j < COLS; j += 1) {
    if (SIMULATION.seizeFacility(`cell_${i}_${j}`, who)) {
      // they were unavailable
      waiting_for[`cell_${i}_${j}`] = true
    } else {
      // they were available
      if (MAP[i][j] == '#') {
        walls = walls - 1
      }
      SIMULATION.releaseFacility(`cell_${i}_${j}`, who)
    }
  }

  while (walls > 0) {
    let cell = yield;
    let i = parseInt(cell.split('_')[1])
    let j = parseInt(cell.split('_')[2])
    if (MAP[i][j] == '#') {
      walls = walls - 1
    }
  }

  // we can deduce the remainder!
  for (let j = 0; j < COLS; j += 1) {
    if (MAP[i][j] == '.') {
      MAP[i][j] = 'x'
      paintNonwallAt(i, j)
      SIMULATION.startFacility(`cell_${i}_${j}`)
    }
  }

  for (let cell in waiting_for) {
    SIMULATION.releaseFacility(cell, who)
  }
}
- I like "capturing" something that I am doing in my mind, like a deduction in a puzzle, and writing it down as something for the computer to do.
- To iterate "horizontally" across a row in a grid, a for loop like
for (let j = 0; j < COLS; j += 1) {might work. - In software things can often be shoehorned or bodged together even if they don't seem like they ought to go. (Furthermore, if it is a stupid hack, but it works, then it's a legitimate technique.)
Also, I recorded myself saying similar as the text here, but in the form of a video.
Step 5: Clicking to discover a wall
There is one deduction happening, but currently I can't click to explain my deductions to the solver. To add that behavior, I add an event listener to the click event.
CANVAS.addEventListener('click', (event) => {
  let [x, y] = [event.offsetX / 2, event.offsetY / 2]
  let [row, col] = [Math.floor((y - TOP_EDGE) / 16), Math.floor((x - LEFT_EDGE) / 16)]

  if (row < 0 || ROWS <= row ||
    col < 0 || COLS <= col
  ) {
    // out of bounds
    return
  }

  discoverWallAt(row, col)
  SIMULATION.runSlow()
})
Now I can click to place walls.
- Often, things like clicking work by attaching 'listeners' to receive control flow when that event happens.
- Logging 'the stuff that I happen have, so far, right here' often lets us learn how things work by exploring.
- A small amount of math, mostly integer division, is both necessary and sufficient to transform
x, yintorow, col.
Also, I recorded myself saying similar as the text here, but in the form of a video.
Step 6: Right clicking to discover a nonwall
Clicking lets me say "I have deduced that this is a wall" to the solver. Next I'd like to have some way to say: "I have deduced that this is a nonwall"
The problem with right-clicking is that by default, right-clicking on a canvas leads a context menu to show up.
To suppress that behavior, I add an event listener to the contextmenu event and invoke preventDefault().
CANVAS.addEventListener('contextmenu', (event) => {
  event.preventDefault()
})
But I still don't get click events when I right-click. I can use mousedown events instead; but mousedown events fire for both left and right clicks. To distinguish between left and right clicks, the mouse event has a button field that is 0 for left-click and 2 for right-click.
  if (event.button == 0) {
    // left click
    discoverWallAt(row, col);
  } else {
    // right click, button = 2
    discoverNonwallAt(row, col);
  }
Now right-clicking works to discover nonwalls, but the row process doesn't do any deduction based on that. I add another counter to the row process - so now it looks like this:
function* row_process(who, i, walls) {
  console.log(`${who} is awake and active`); // DEBUG
  let nonwalls = COLS - walls;

  let waiting_for = {};
  for (let j = 0; j < COLS; j += 1) {
    if (SIMULATION.seizeFacility(`cell_${i}_${j}`, who)) {
      // they were unavailable, at least at first.
      waiting_for[`cell_${i}_${j}`] = true;
      continue;
    }
    // they were available immediately.
    if (MAP[i][j] == '#') {
      walls = walls - 1;
    } else {
      nonwalls = nonwalls - 1;
    }
    SIMULATION.releaseFacility(`cell_${i}_${j}`, who);
  }

  while (walls > 0 && nonwalls > 0) {
    let cell = yield; // yield returns something like `cell_3_4`, meaning that someone has discovered something.
    // DEBUG console.log(`${who} saw ${cell}`);
    let i = parseInt(cell.split('_')[1]);
    let j = parseInt(cell.split('_')[2]);
    if (MAP[i][j] == '#') {
      walls = walls - 1;
    } else {
      nonwalls = nonwalls - 1;
    }
    SIMULATION.releaseFacility(`cell_${i}_${j}`, who)
  }

  if (walls == 0) {
    console.log(`${who} can deduce some nonwalls!`); // DEBUG
  } else if (nonwalls == 0) {
    console.log(`${who} can deduce some walls!`); // DEBUG
  }

  for (let j = 0; j < COLS; j += 1) {
    if (MAP[i][j] == '.') {
      if (walls == 0) {
        discoverNonwallAt(i, j);
      } else if (nonwalls == 0) {
        discoverWallAt(i, j);
      }
    }
  }

  for (let cell in waiting_for) {
    SIMULATION.releaseFacility(cell, who);
  }
}
Also, I recorded myself saying similar as the text here, but in the form of a video.
Step 7: Copy-paste-modify the row process to create a col process
Currently the solver doesn't make column deductions; but they're just like the row deductions. So I can copy and paste and modify the row process (which is a standard move in programming).
It's conventional to use variables named i and j when working with a two dimensional array. The i variable will normally iterate over rows, and the j variable will normally iterate over columns.
In the modifications, I change i to j and rows to cols, but a lot of it stays the same.
function* col_process(who, j, walls) {
  console.log(`${who} is awake and active`); // DEBUG
  let nonwalls = ROWS - walls;

  let waiting_for = {};
  for (let i = 0; i < ROWS; i += 1) {
    if (SIMULATION.seizeFacility(`cell_${i}_${j}`, who)) {
      // they were unavailable, at least at first.
      waiting_for[`cell_${i}_${j}`] = true;
      continue;
    }
    // they were available immediately.
    if (MAP[i][j] == '#') {
      walls = walls - 1;
    } else {
      nonwalls = nonwalls - 1;
    }
    SIMULATION.releaseFacility(`cell_${i}_${j}`, who);
  }

  while (walls > 0 && nonwalls > 0) {
    let cell = yield; // yield returns something like `cell_3_4`, meaning that someone has discovered something.
    // DEBUG console.log(`${who} saw ${cell}`);
    let i = parseInt(cell.split('_')[1]);
    let j = parseInt(cell.split('_')[2]);
    if (MAP[i][j] == '#') {
      walls = walls - 1;
    } else {
      nonwalls = nonwalls - 1;
    }
    SIMULATION.releaseFacility(`cell_${i}_${j}`, who)
  }

  if (walls == 0) {
    console.log(`${who} can deduce some nonwalls!`); // DEBUG
  } else if (nonwalls == 0) {
    console.log(`${who} can deduce some walls!`); // DEBUG
  }

  for (let i = 0; i < ROWS; i += 1) {
    if (MAP[i][j] == '.') {
      if (walls == 0) {
        discoverNonwallAt(i, j);
      } else if (nonwalls == 0) {
        discoverWallAt(i, j);
      }
    }
  }

  for (let cell in waiting_for) {
    SIMULATION.releaseFacility(cell, who);
  }
}
Also, I recorded myself saying similar as the text here, but in the form of a video.
Step 8: Factor out the common code
I notice that there's a small rewrite possible: In the row process, the last two loops could be combined into one.
  for (let cell in waiting_for) {
    SIMULATION.releaseFacility(cell, who);
    if (MAP[i][j] == '.') {
      if (walls == 0) {
        discoverNonwallAt(i, j);
      } else if (nonwalls == 0) {
        discoverWallAt(i, j);
      }
    }
  }
But because the row process and the col process are very similar (due to their shared copy-paste-and-modify lineage), there is a simplification possible in the col process. So I factor out the common code. After this transformation, there are still a row_process and a col_process, but they're much smaller, like stumps, and they each delegate to an exact_constraint_process, which holds the parts that are common.
This "factor out what is common" is a very standard move in programming.
There is a slogan "Don't Repeat Yourself" (or the acronym "DRY") which recommends doing this move as much as possible. But it can be taken too far. For example, sometimes that slogan can lead programmers to avoid ever using copy-paste-and-modify, because it seems to be going in the wrong direction. But I don't want to feel trapped and unable to make changes. So I try to hold the "DRY" slogan lightly, which means my code often has some factor-out-able repetitiveness, at least for a while.
function* row_process(who, i, walls) {
  console.log(`${who} is awake and active`); // DEBUG

  let spots = []
  for (let j = 0; j < COLS; j += 1) {
    spots.push([i, j])
  }

  yield* exact_constraint_process(who, spots, walls);
}

function* col_process(who, j, walls) {
  console.log(`${who} is awake and active`); // DEBUG

  let spots = []
  for (let i = 0; i < ROWS; i += 1) {
    spots.push([i, j])
  }

  yield* exact_constraint_process(who, spots, walls);
}

function* exact_constraint_process(who, spots, walls) {
  let nonwalls = spots.length - walls;

  let waiting_for = {};
  for (const spot of spots) {
    let [i, j] = spot;
Then I can do the small rewrite that I was thinking of.
Also, I recorded myself saying similar as the text here, but in the form of a video.
Step 9: Use the exact constraint process to make a monster process
There's a rule, that monsters are always in a dead end. So if a monster has three squares next to it, and one of them is known to be a nonwall, then the other two have to be walls.
That's analogous reasoning to the row process and col process. Instead of building a set of spots by interating over a row or iterating over a column, the monster process will build a set of spots by looking at all four directions, north, south, east, west from the given monster.
How many walls are in that set though? Well, if the monster is in the middle of the map, then there are three walls and one nonwall. But if the monster is near the edge of the map, then there might be fewer.
In general there is going to be exactly one nonwall, and the rest are walls. So we can use the size of the set of neighbors, minus one, as the "clue", the number of walls, that we pass to the exact constraint process.
function* monster_process(who, i, j) {
  console.log(`${who} is awake and active`); // DEBUG

  let DIRS = [
    [-1, 0], // north
    [0, 1], // east
    [0, -1], // west
    [1, 0], // south
  ]
  let spots = []
  for (const d of DIRS) {
    if (out_of_bounds(i + d[0], j + d[1])) {
      continue;
    }
    // in bounds
    spots.push([i + d[0], j + d[1]])
  }

  yield* exact_constraint_process(who, spots, spots.length - 1);
}
Also, I recorded myself saying similar as the text here, but in the form of a video.